
Card of the week 474
Instructions 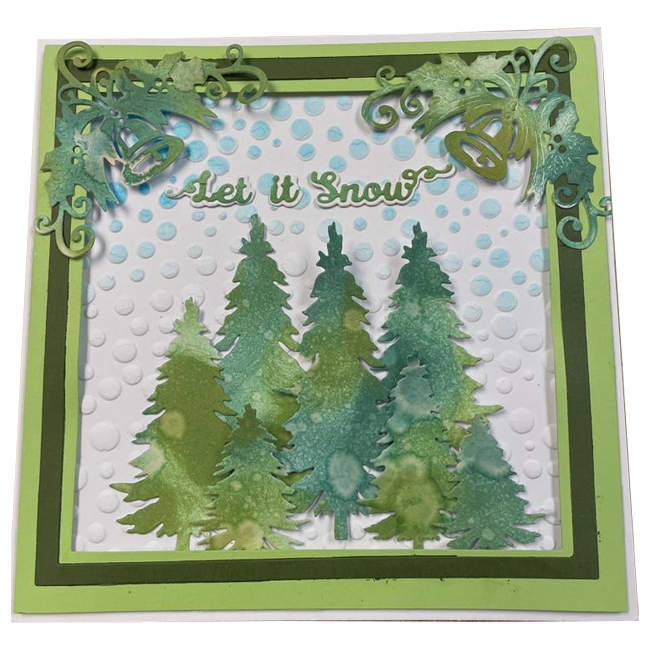
Step 1
Take a piece of white card and cut to the size of the embossing folder.
Step 2
Place in the folder and emboss.
Step 3
Lay the snow stencil, over the top of the embossed image and with phtalo blue using a blending tool colour the top.
Step 4 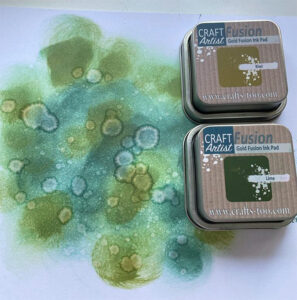
Colour the rest of the white card with lime and kiwi fusion ink using a blending tool. Don’t try to be neat, it will look a mess but when you cut it out it looks great.
Step 5
Spray the card with water, it will give you a snow effect as it will take the colour out.
Step 6 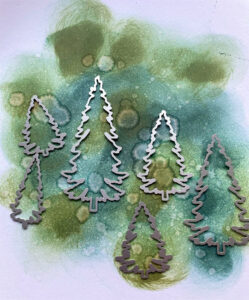
When dry cut out the trees, the words and the bells.
Step 7
With the green card, cut out two frames, from PCD204 the square die.
Step 8
Assemble as picture.
Step 9
Snow first then the trees, put some flat and some on foam.
Step 10
Add foam to the frame.
Step 11
Cut a background in white for your words (let it snow), stick together.
Step 12
Add your bells to the corner.