
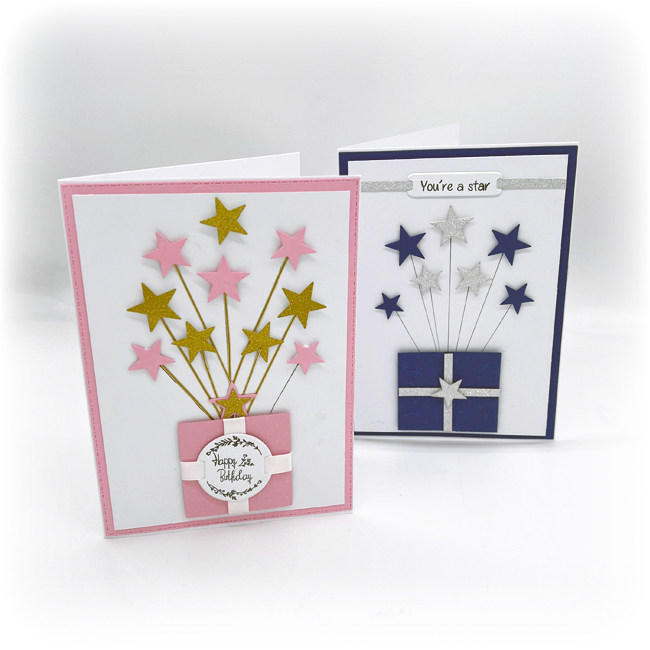
Card of the week 510
This week is a universal greetings card, ideal for those men in your life who aren’t into sports or DIY, but equally useful for ladies or children
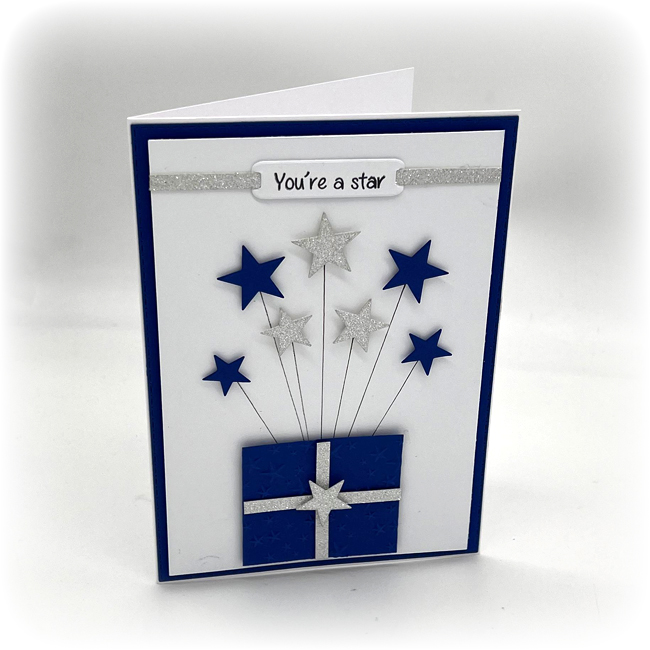
Blue Card Instructions
 Step 1
Cut a blue mount using the stitch dot rectangle die that measures 12.5cm x 17.5cm and adhere this to your card blank.
Step 2
Cut a white mount measuring 11.5cm x 16.5cm and layer this onto your blue mount with foam pads.
Step 3
Cut a selection of stars in blue and silver glitter card.
Step 4
Emboss a 6cm x 5cm scrap of blue card. Cut thin strips of silver glitter card and adhere in a cross to represent ribbon around a parcel and add a silver star to the centre.
Step 5
Play around with the positioning of the blue and silver stars until you are happy with the arrangement – use as many or as few as you like. Once you are happy, you will need to add the lines in – you could use a ruler and a black pen or a peel off sticker. Draw these from your star down to where the ‘present’ will cover them towards the bottom. Add your star to the top of the line with foam dots.
Step 6
Position your ‘present’ centrally along the bottom of the card and adhere with foam pads.
Step 7
Cut the 5cm long ribbon tag and stamp ‘You’re a star’ from the Star Gnome set. Attach to a 6cm wide strip of card and adhere centrally along the top of the card.
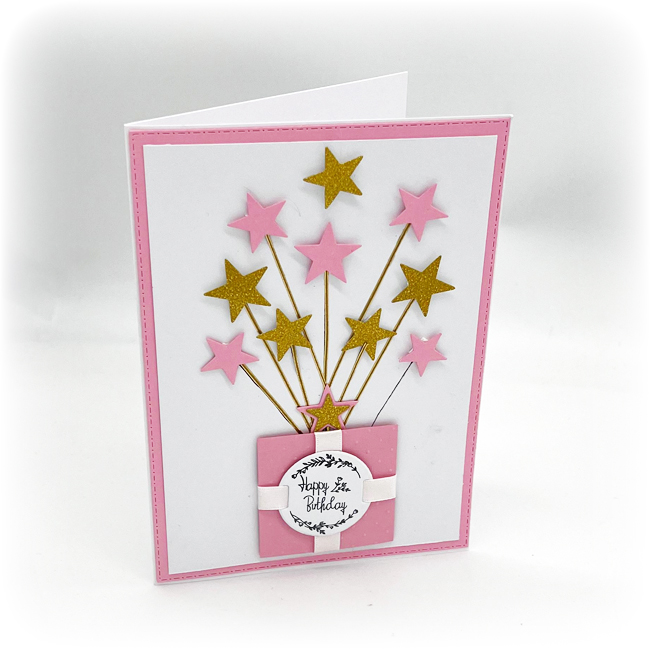
Pink Card Instructions
Step 1
Cut a pink mount using the stitch dot rectangle die that measures 12.5cm x 17.5cm and adhere this to your card blank.
Step 2
Cut a white mount measuring 11.5cm x 16.5cm and layer this onto your blue mount with foam pads.
Step 3
Cut a selection of stars in pink and gold glitter card.
Step 4
Emboss a 6cm x 6cm scrap of pink card. Wrap a piece of 6mm pink satin ribbon around the square to form a cross.
Step 5
Play around with the positioning of the pink and gold stars until you are happy with the arrangement – use as many or as few as you like. Once you are happy, you will need to add the lines in – you could use a ruler and a black pen or a peel off sticker. Draw these from your star down to where the ‘present’ will cover them towards the bottom. Add your star to the top of the line with foam dots.
Step 6
Position your ‘present’ centrally along the bottom of the card and adhere with foam pads.
Step 7
Cut the 4cm round ribbon tag and stamp your sentiment; attach to the ribbon around your ‘present’.